Unraveling the Art of Image Creation and Container Execution

Introduction
Welcome to Docker! Here, containers change how we pack, deploy, and manage apps. Let's explore how stunning images become useful containers
Tech's changing fast, needing flexible solutions. That's where Docker steps in, using containers to pack apps neatly. These containers are like little ships, made from images. They keep things consistent, work fast, and adapt to different setups.
We're on a trip to see how Docker makes these images. It's like a plan for building strong images that hold all app details. And when these images start working in containers, it's like a dance, smoothly moving across different systems.
Whether you're a pro in containers or new to Docker's world, this guide helps master Docker images and containers. Let's dive in and see how code turns into useful, flexible containers.
Understanding Docker Images
Docker images are like a plan for containers. They're a frozen picture of what an app needs—code, stuff it uses, and settings. They're light and can't change, making them great for containers.
Inside, images have layers, like building blocks. These layers show what's changed from the main image. Understanding these layers helps make images quickly and easily shared.
To make these images, there's a special file called Dockerfile. It's a guide that tells how to build an image. It sets up what the app needs, like installing stuff and setting things up.
Once you get how Docker images work—their parts, layers, and the importance of Dockerfile—you're ready to create and manage them like a pro!
Building Docker Images
Building Docker images involves a meticulous process that begins with defining the image's blueprint using a Dockerfile. Let's unravel the steps involved in creating these essential building blocks while utilizing Node.js.
Constructing the Dockerfile for a Node.js Application
Let's create a Dockerfile for a simple Node.js application. Below is an example demonstrating the steps involved:
Dockerfile (keep this file inside the project directory)
Building the Docker Image
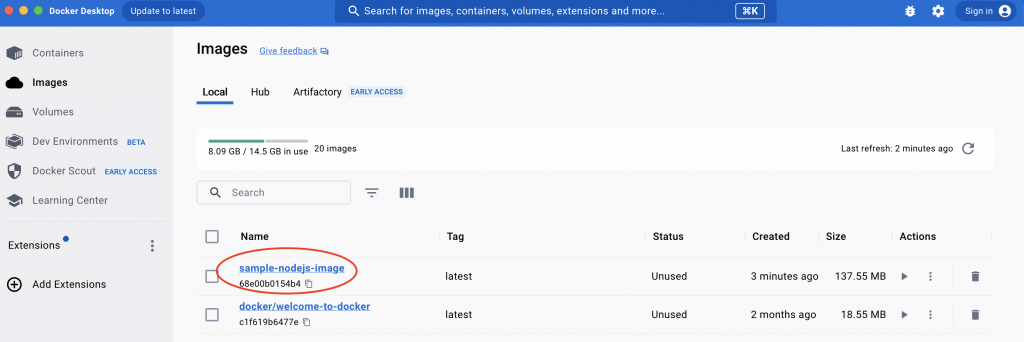
Once the Dockerfile is ready, navigate to the directory containing your Node.js application and the Dockerfile. Run the following command to build the Docker image:
Replace [sample-nodejs-image] with the desired name for your Docker image. This command instructs Docker to execute the instructions outlined in the Dockerfile, creating an image based on the Node.js application setup specified.
Running Docker Images as Containers
Having crafted Docker images, the next step is to bring them to life as functional containers. Let's delve into the process of running these images as containers, executing applications seamlessly within Docker's environment.
The transition from images to running containers involves the docker run command—a versatile tool enabling the instantiation of containers from existing images. This command equips containers with the necessary environment and dependencies defined within the image.
During the container instantiation process, Docker offers various configuration options to tailor the container's behavior. Parameters such as ports mapping, volume mounting, environment variables, and resource allocation play pivotal roles in customizing container behavior based on application requirements.
Let's continue our Node.js example by running the previously built image as a container. Execute the following command:
docker run -dp 127.0.0.1:3011:3011 sample-nodejs-imageThe -d flag (short for --detach) runs the container in the background. This means that Docker starts your container and returns you to the terminal prompt. You can verify that a container is running by viewing it in Docker Dashboard under Containers, or by running docker ps in the terminal.
The -p flag (short for --publish) creates a port mapping between the host and the container. The -p flag takes a string value in the format of HOST:CONTAINER, where HOST is the address on the host, and CONTAINER is the port on the container. The command publishes the container's port 3000 to 127.0.0.1:3000 (localhost:3000) on the host. Without the port mapping, you wouldn't be able to access the application from the host.
By following these steps with a Node.js application, you'll gain firsthand experience in constructing Docker images and initiating containers, facilitating a deeper understanding of Docker's image creation process
Understanding how to manage running containers is crucial. Docker provides commands like docker ps, docker stop, docker start, and docker rm to view, stop, start, and remove containers, respectively. Learning these commands facilitates effective container management.
By grasping these fundamental aspects of running Docker images as containers and executing practical examples, you'll adeptly manage and orchestrate applications within Docker's containerized environment.
Conclusion
Congratulations on embarking on this immersive journey into the realm of Docker's image creation and container execution. Throughout this guide, we've unravelled the intricate artistry behind Docker's magic, empowering you with the knowledge and skills to navigate the world of containerization proficiently.
From comprehending the essence of Docker images to constructing them using Dockerfiles, and from running these images as containers to managing their lifecycle, you've gained invaluable insights into harnessing Docker's capabilities for your applications.
As you continue your Docker odyssey, remember that mastering this transformative technology is an ongoing voyage. Experimentation, exploration, and continuous learning will further elevate your proficiency in leveraging Docker's potential to encapsulate, deploy, and manage applications with unparalleled efficiency.
Whether you're an experienced developer seeking greater efficiency or an enthusiast venturing into the world of containerization, keep honing your skills and discovering new possibilities. The magic of Docker lies in its ability to streamline and simplify the deployment of applications—may this guide serve as your guiding light in this transformative journey.
Step forth with confidence, wield the power of Docker's images and containers, and craft innovative, scalable, and resilient applications in your pursuit of technological excellence.
Happy containerizing!
Docker Commands Cheat Sheet
Managing Images and Containers
Images
docker images: List all available Docker images.docker pull <image_name>: Pull an image from a registry.docker rmi <image_name>: Remove a specific image.docker image prune: Remove unused images.
Containers
docker ps: List running containers.docker ps -a: List all containers (running and stopped).docker run <image_name>: Create and start a container from an image.docker start <container_name>: Start a stopped container.docker stop <container_name>: Stop a running container.docker rm <container_name>: Remove a specific container.docker container prune: Remove stopped containers.
Building and Managing Dockerfiles
Building Images
docker build -t <image_name> .: Build an image from a Dockerfile.docker build -f <Dockerfile_name> -t <image_name> .: Build an image using a specific Dockerfile.
Dockerfile Operations
FROM: Specify the base image.RUN: Execute commands during image build.COPY: Add files from the host to the image.CMD: Define the default command to run when the container starts.EXPOSE: Expose ports from the container.
Networks and Volumes
Networks
docker network ls: List Docker networks.docker network create <network_name>: Create a new network.docker network connect <network_name> <container_name>: Connect a container to a network.docker network disconnect <network_name> <container_name>: Disconnect a container from a network.
Volumes
docker volume ls: List Docker volumes.docker volume create <volume_name>: Create a new volume.docker volume rm <volume_name>: Remove a specific volume.
Registry and Logs
Registry
docker login: Log in to a Docker registry.docker push <image_name>: Push an image to a registry.docker pull <image_name>: Pull an image from a registry.
Logs
docker logs <container_name>: View logs of a specific container.docker logs -f <container_name>: Follow logs in real-time.