Cloud storage is one of the crucial components of cloud computing and there are very few that provide as much flexibility as AWS Simple Storage Service or commonly AWS S3. Normally, virtual private servers come with minimal storage to accommodate programs and services which can be extended. But these attached storages get more expensive since they are faster, frequently accessed and must remain standby as long as the dependent instance(s) are running. AWS Elastic Block Storage is such a storage solution for all their computing instances. Considering all these, AWS S3 is the most viable and cost-effective solution for storing large amounts of data with all the benefits along. Let’s look a little bit more in-depth!
AWS S3 has several storage classes for different suits of businesses. But for easy going we’re going to look at their general purpose storage tier called “S3 Standard”. Let’s take a look at some technical details of this storage class:
- Uptime rated at 99.99% over a given year
- Low latency and high throughput
- Protection against unavailability of an entire Availability Zone
- Data protection with SSL
- At least 3500 req/sec for data adding and 5500 req/sec for retrieving data for a given path (prefix)
So, we can see that the performance of such object storage service is quite good.
AWS S3 calls each designated storage a “Bucket”. This is the first step of using S3 services. Each bucket is an isolated container that stores data using the bucket access credentials. Let’s take a look at the process of getting started with AWS S3.
First, we need to login to our AWS Management Console from a web browser. Then from the search box of the webpage type S3. You’ll see a few results popup. Select S3 not S3 Glacier. We’ll talk about S3 Glacier in a separate post. Now, clicking on S3 will take you to its management dashboard which, at the time of writing this post, looks like this:
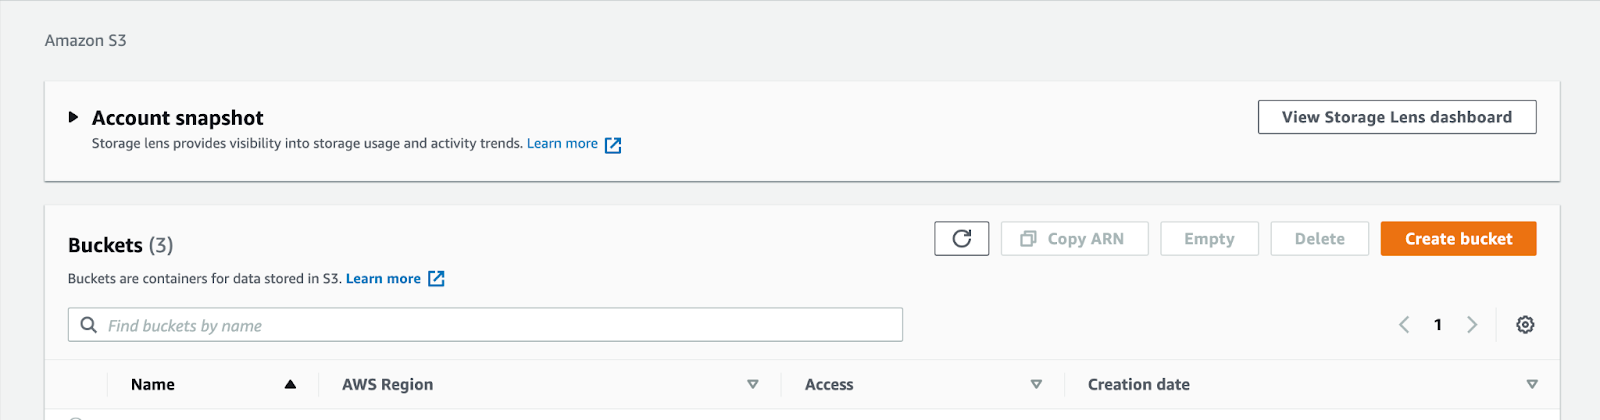
Click on the “Create Bucket” button to get started. This will take you to a new page where we’ll configure its settings. When you arrive at this page it will look something like this:
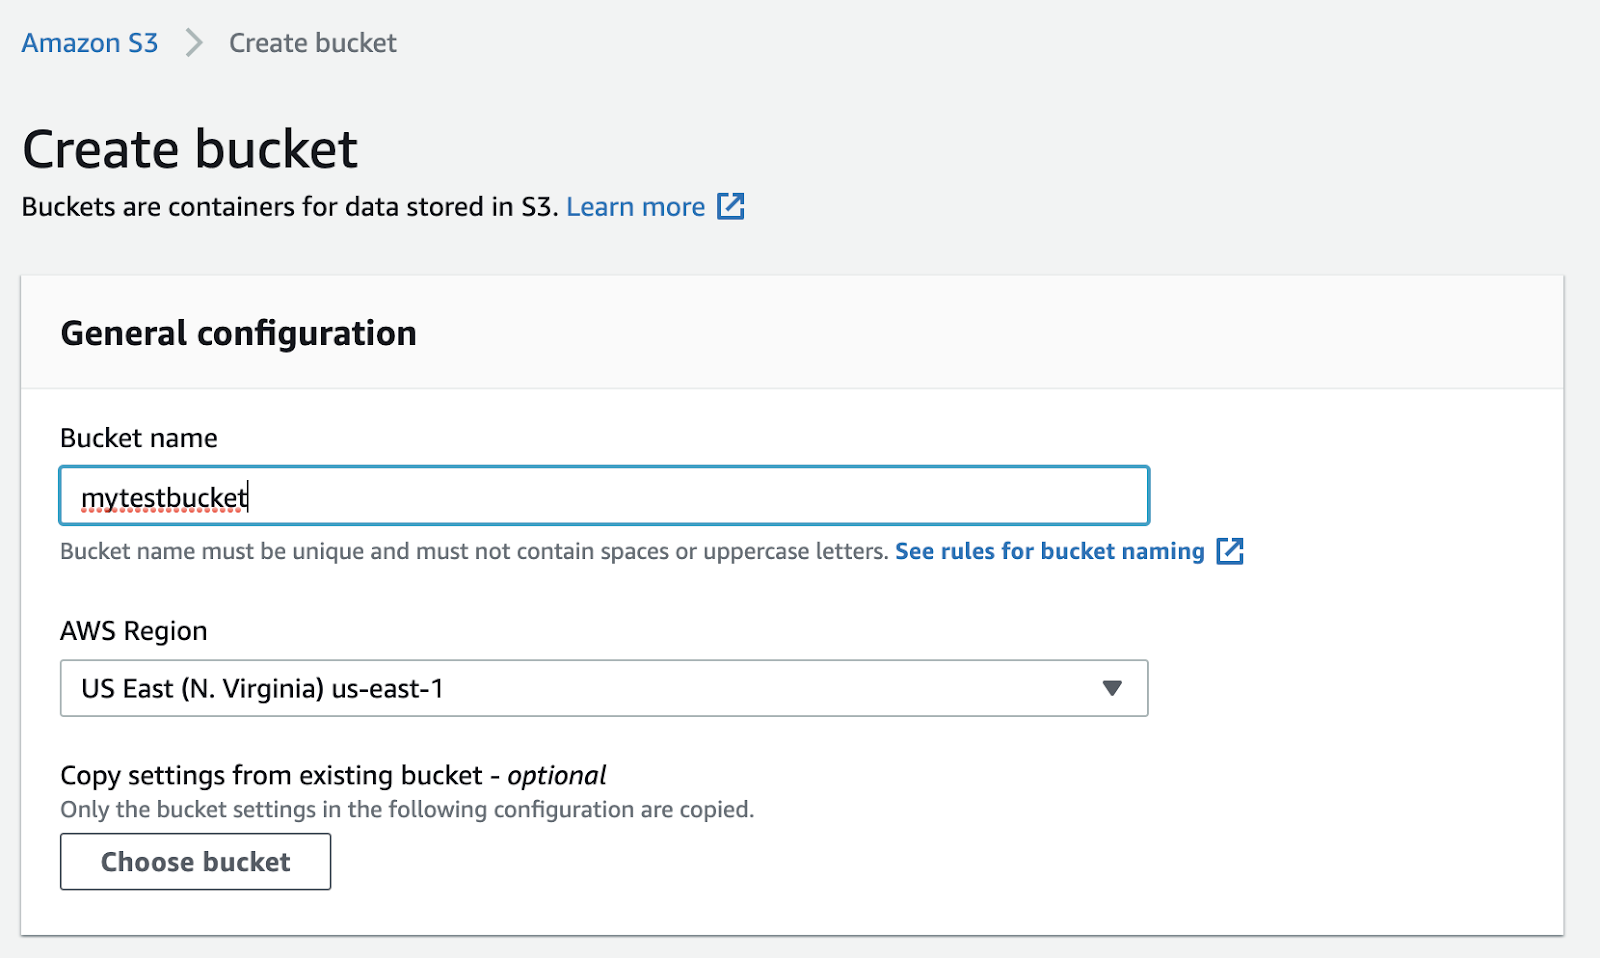
Give a name of the bucket by which we can identify, fetch and upload data. The naming rules that AWS set are following:
| > Bucket names must be between 3 and 63 characters long. > Bucket names can consist only of lowercase letters, numbers, dots (.), and hyphens (-). > Bucket names must begin and end with a letter or number. > Bucket names must not be formatted as an IP address (for example, 192.168.5.4). > Bucket names must be unique within a partition. A partition is a grouping of Regions. AWS currently has three partitions: aws (Standard Regions), aws-cn (China Regions), and aws-us-gov (AWS GovCloud [US] Regions). > Buckets used with Amazon S3 Transfer Acceleration can’t have dots (.) in their names. For more information about Transfer Acceleration, see Configuring fast, secure file transfers using Amazon S3 Transfer Acceleration. |
After setting a name, choose the appropriate region as your availability zone. If you use AWS EC2 for hosting your application, choosing the same region will reduce the latency between server and S3 bucket. Then scroll down and unblock public access just like the following image.
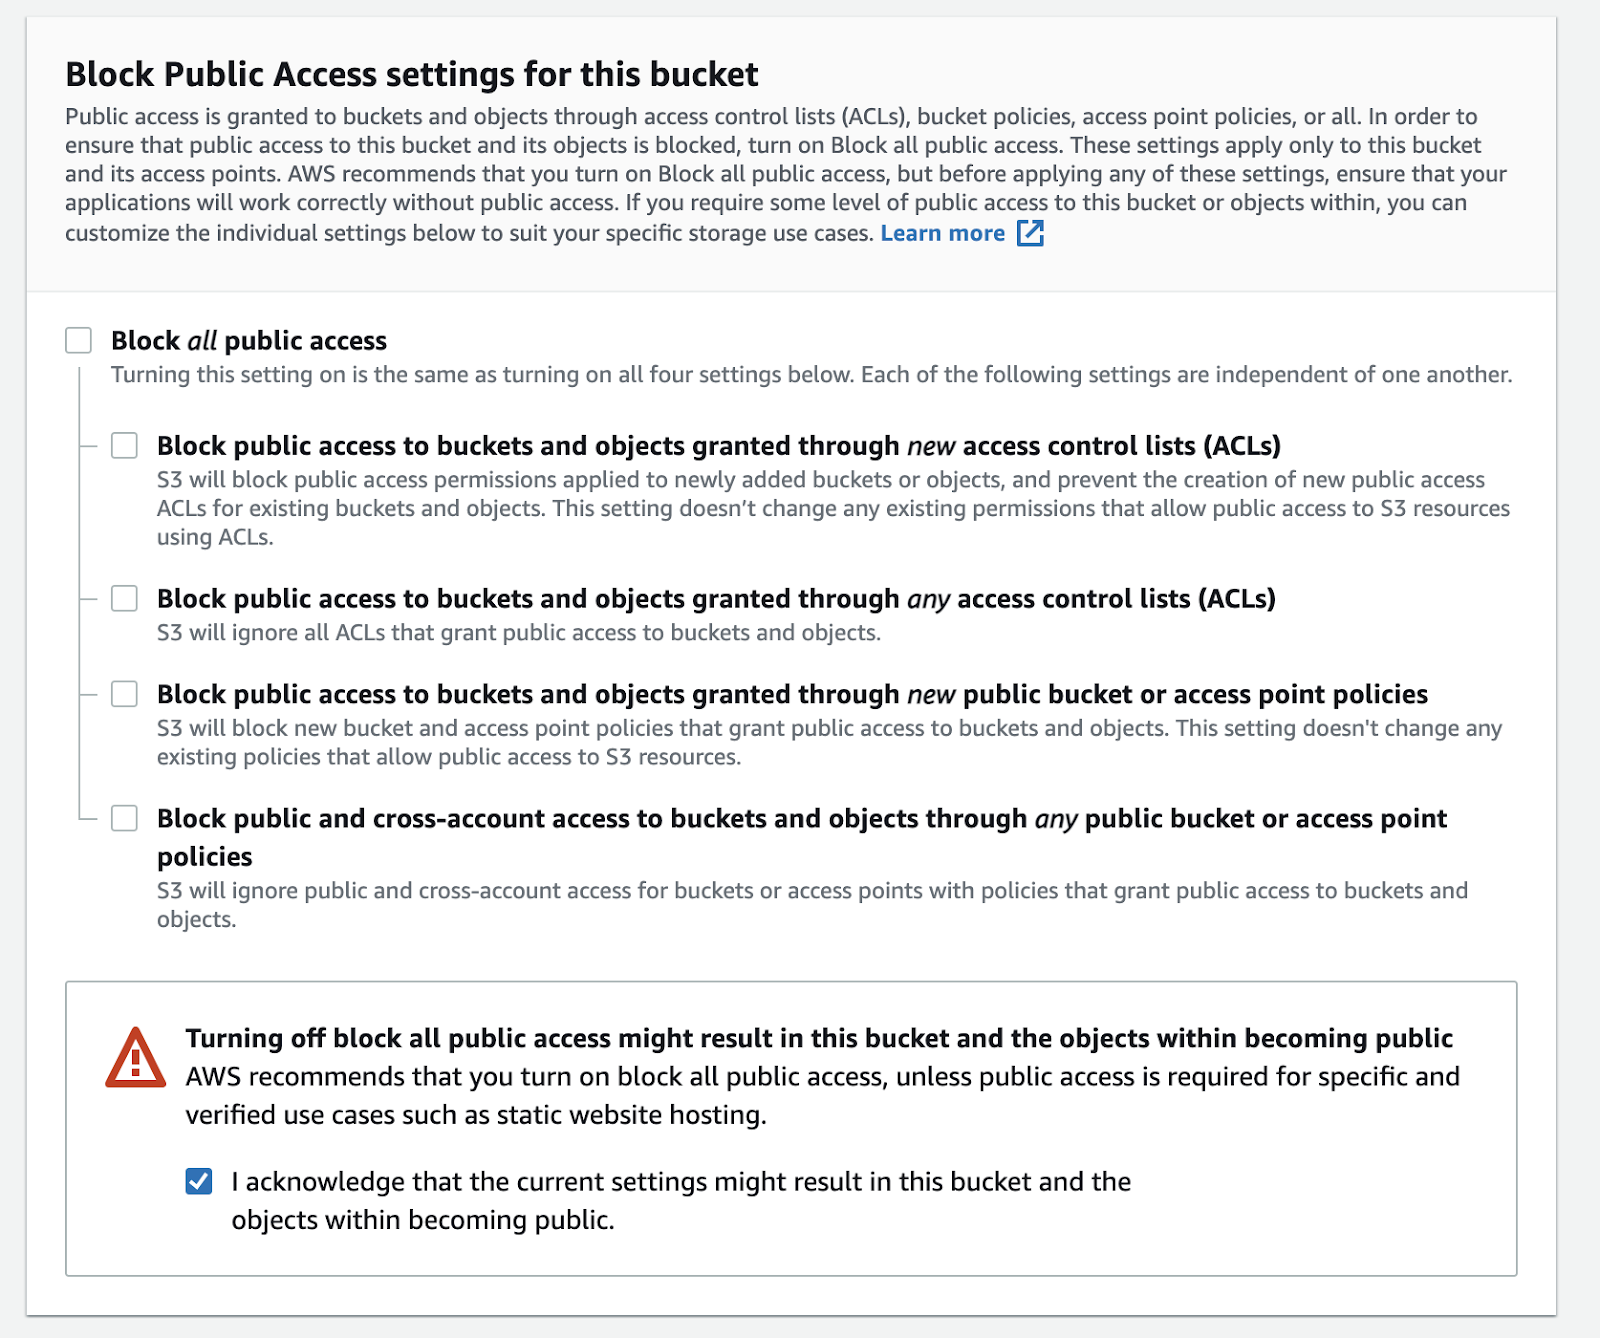
This doesn’t mean that anyone with an URI can access your asset. Anyone trying to directly access any object in the bucket will result in this:

Lastly, click on the “Create Bucket” and your storage is ready for use.
After you create your bucket, you can add, update and delete objects from their web interface but that’s not what we are looking for. We want programmatic access so that we can access the S3 bucket from our NodeJS server. To do this, we need to generate a user with credentials appropriate for S3 access. To do this, we need to use AWS Identity and Access Management or AWS IAM as commonly referred. We’ll need to search for IAM in the AWS Management Console search box and select the IAM from the dropdown menu. It will take you to this page:

We’ll need to create a new user that will have appropriate read and write permission to access your S3 instances by clicking on the “Add user” button. This will show a popup and guide you through 4 steps.
First step is to set your user name and access type. Since we need programmatic access, we’ll check that box and click next.

Then they will ask to specify which kind of access we’re trying to give to that user. For this, we’re required to create a group policy for S3 full access so that in future we can reuse the same permission for multiple users.

Click on the “Create group” button and a popup will show asking to select type of access and a name for the access group.
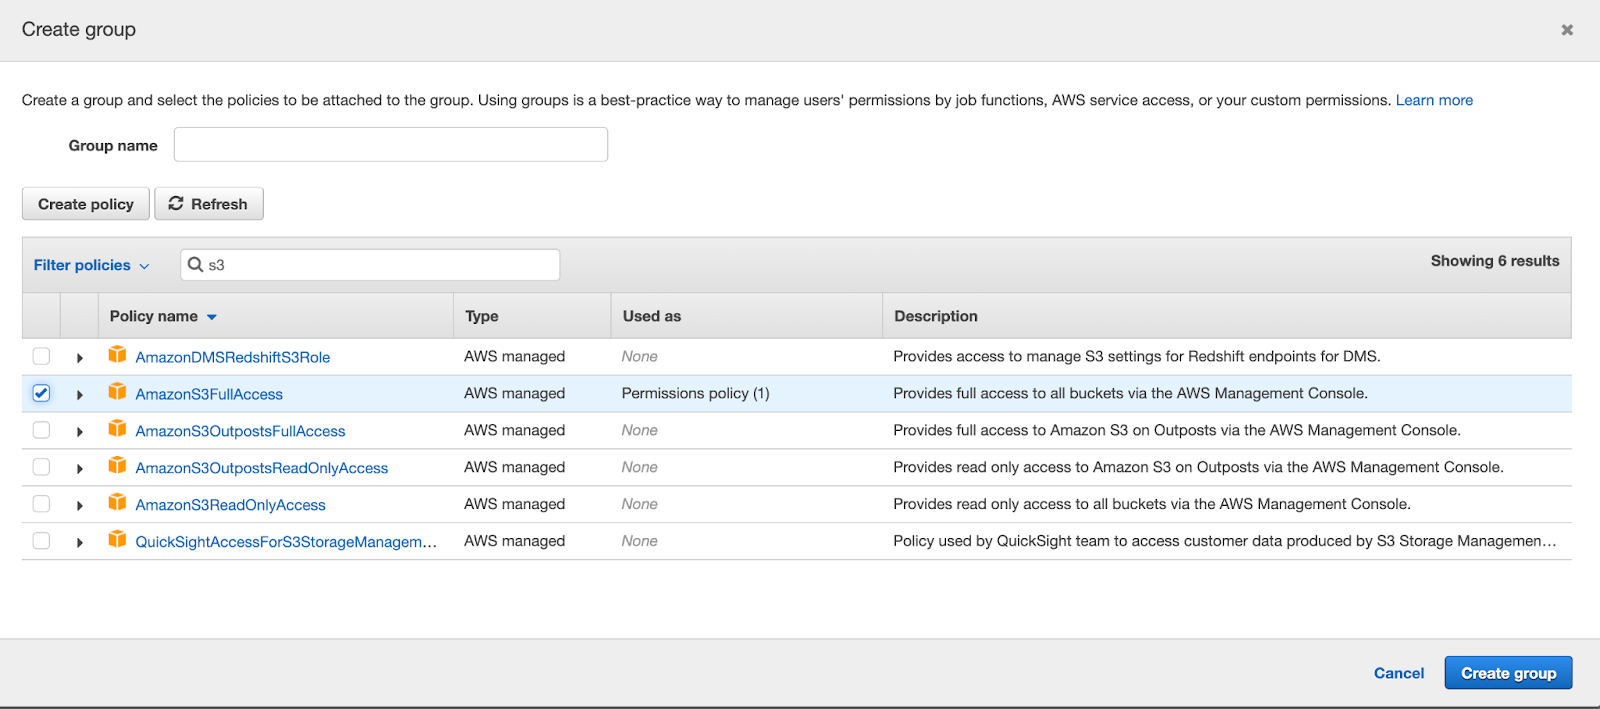
We’ll give a group name for the access and assign “AmazonS3FullAccess” policy for the group and click on the “Create group” button. After that we’ll go back to our user setup screen and select the newly created group as the access group for that user and click next.

We’ll skip tags step for now since that is optional and it is to better organize when you have a bunch of users and click next. In the 4th step, we’ll review our setup and should look something like this:
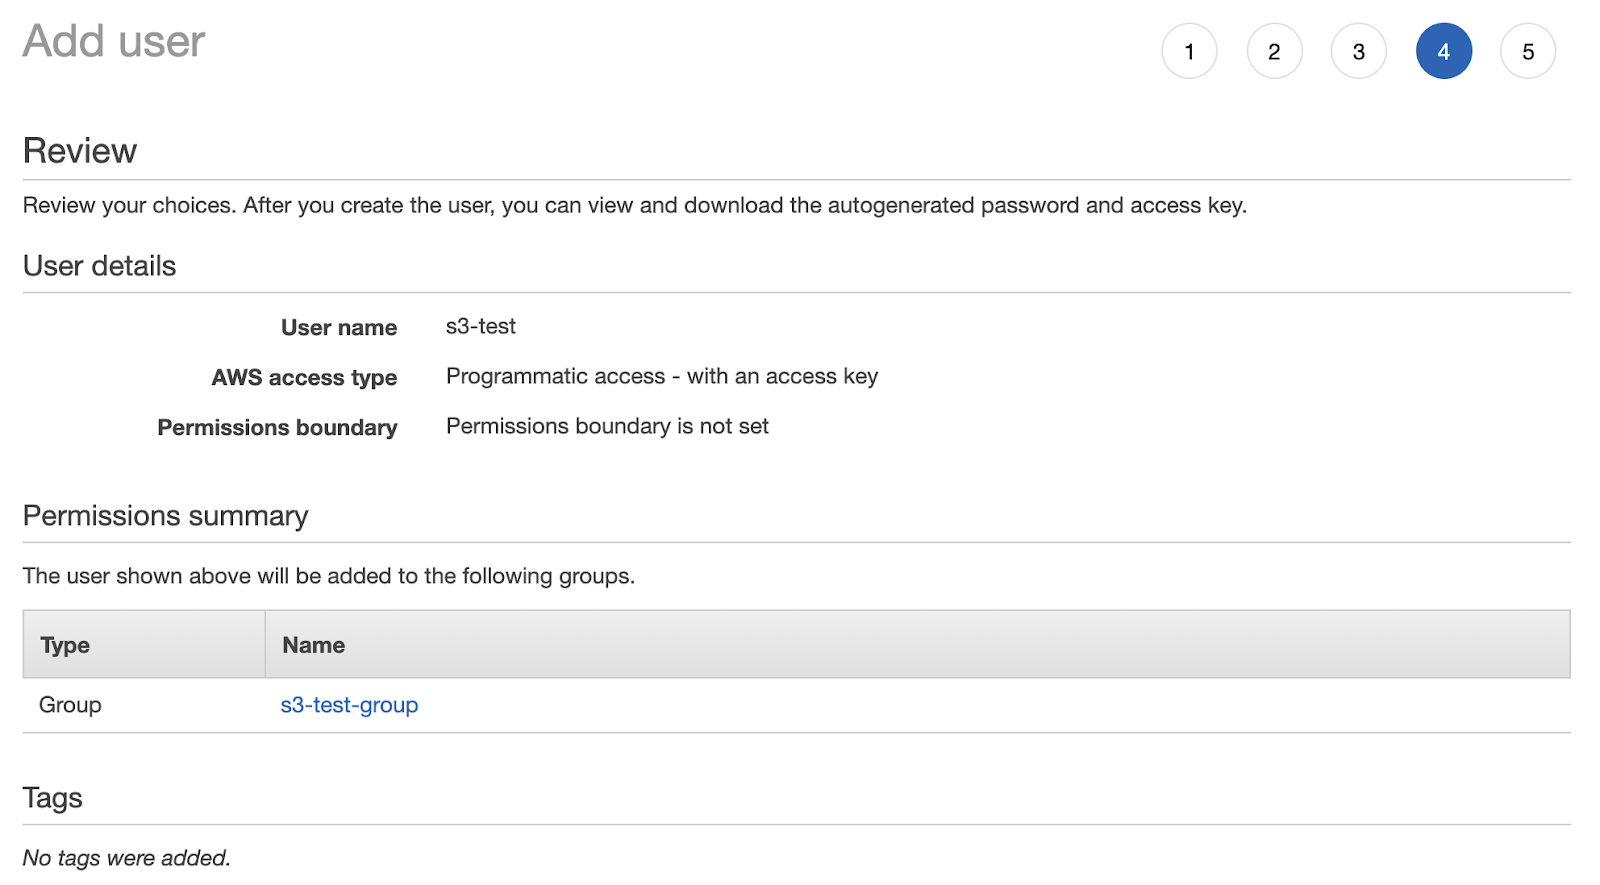
If everything looks good, we’ll click on the “Create user” button which will create the user and take you to the credentials page. Now, this is the most important part. YOU WILL NEED TO WRITE THESE DETAILS DOWN AND SAVE THEM SOMEWHERE SAFE. Click on the show button to reveal the secret and keep all these data to only yourself since anybody who will have these data can access your S3 buckets without you knowing.

Voila! You’re done with your AWS S3 setup with programmatic access!
Now that we’ve finished setting up our AWS side of the work, let’s take a look at how we can integrate a NodeJS application with AWS SDK to use a S3 bucket. For this we need NodeJS with npm and we need to install aws-sdk via package manager using the command:
npm install –save aws-sdk
After installing the package, you can set up the SDK and access your S3 buckets. To setup the SDK, import it into your appropriate code file (can be a service or module) and setup like this:
const AWS = require('aws-sdk');
const S3 = new AWS.S3({
accessKeyId: “Your Access Key ID”,
secretAccessKey: “Your Secret Access Key”
});
Use the access key ID and secret access key that you have saved after creating the user to configure the SDK. Without these, you cannot access your buckets. You are done! Now you can leverage all the awesome functionalities of AWS SDK for S3. For instance, you want to upload a file from your NodeJS server? Right on! Follow this:
return S3.upload({
Key: “File Name”,
Bucket: ”Bucket Name”,
ContentType: fileMimeType,
Body: await Bluebird.promisify(fs.readFile)(filePath)
}).promise();
Key is the filename by which the file will be identified when you fetch them. It’s always a best practice to use “ContentType” since the file mime type is important for user browsers to understand the content.
If you want to retrieve a file, you need to use getObject method like this:
const content = await S3.getObject({Key: fileName, Bucket: awsConfig.bucket_name}).promise()
I hope this is enough for you to get started with AWS S3 and NodeJS!